Connecting to Salesforce
In order to access your Salesforce metadata you need to connect (via OAuth) to one or more Salesforce orgs.
You can manage orgs both in your personal account, as well as (separately) for each team that you are a member of.
Connecting to a new Salesforce org
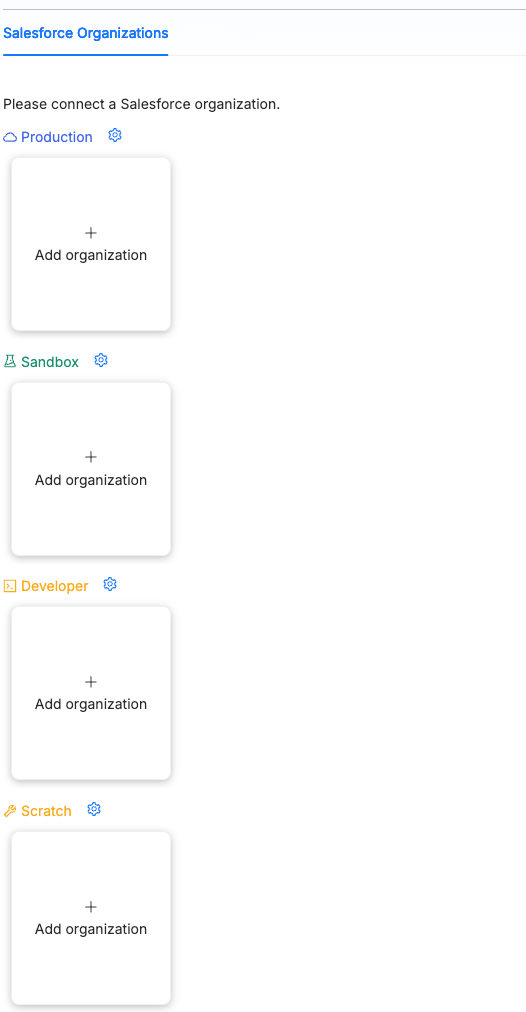
To add a new org, navigate to https://app.cirra.ai/. If this is a new account, you should see a page like this:
Click the Add Organization button. In the dialog that appears, select the Environment type, optionally enter a custom domain (required when using a passkey), and click Connect.
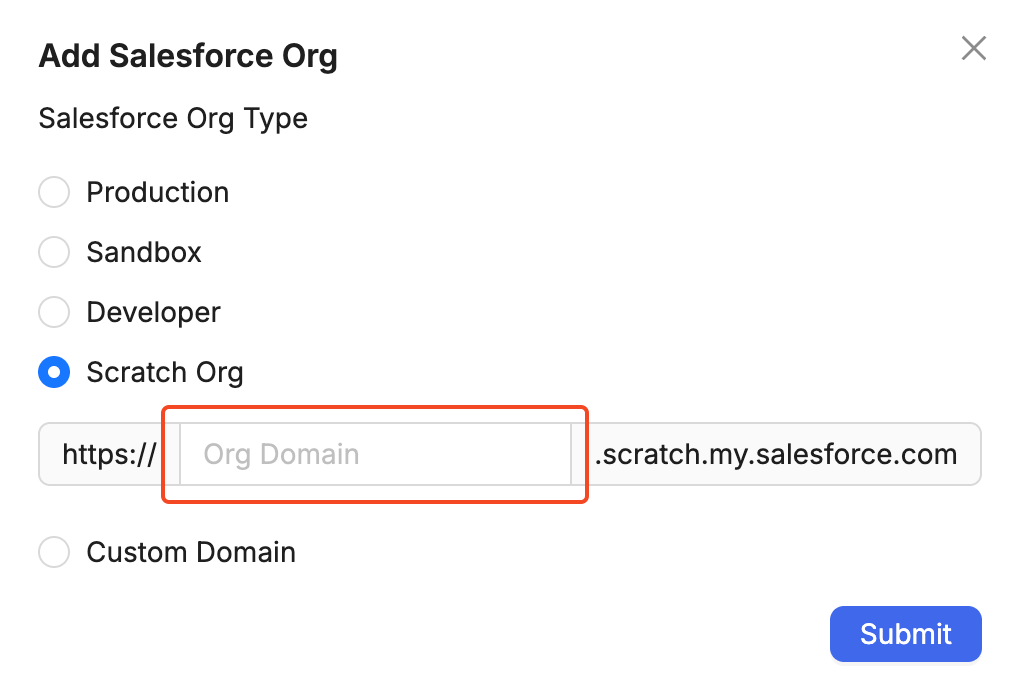
You can connect using either a Connected App or an External Client App. To learn more about the choices, see Connected App vs External Client App.
After entering your Salesforce login credentials you will be asked to authorize access to your org:
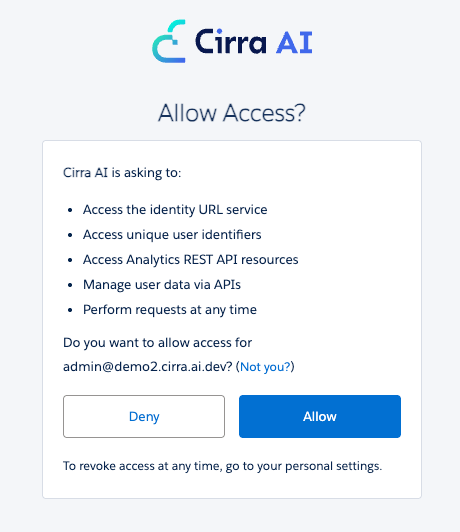
Note that we only ask for the minimum permissions required to manage your Salesforce org via the API. The OAuth credentials requested cannot be used to log into the Salesforce UI, only for access via API.
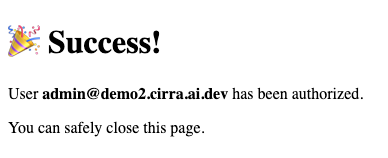
Clicking Allow should show a confirmation as follows:
If you receive an OAuth approval error after authorizing access, see Troubleshooting OAuth approvals below.
If the authorization flow was successful, the new org should appear:
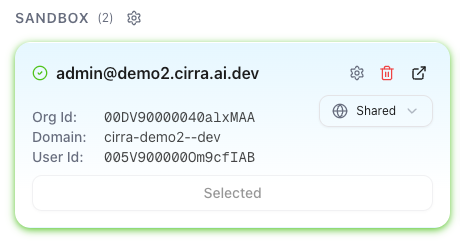
Cirra AI will act under the permissions of the user who granted the OAuth permissions, so it will only be able to make changes that the user would be able to make manually in the Setup UI.
See below under Access rights and security for more details.
Selecting the active org
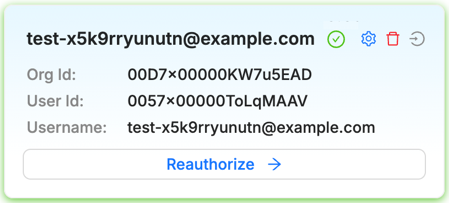
The MCP server can only interact with one org at a time. The default active org is indicated by:
-
a green border if it has a valid OAuth connection
-
an orange or red border if the OAuth has expired or is invalid
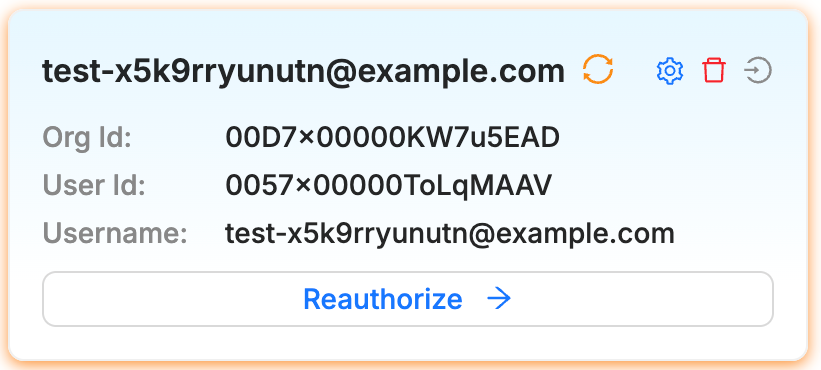
To change the active org, click the Select, Reauthorize or Reconnect button for the desired org.
Note that you can also switch the target org using the MCP server as explained in Switching between Salesforce orgs
Managing orgs
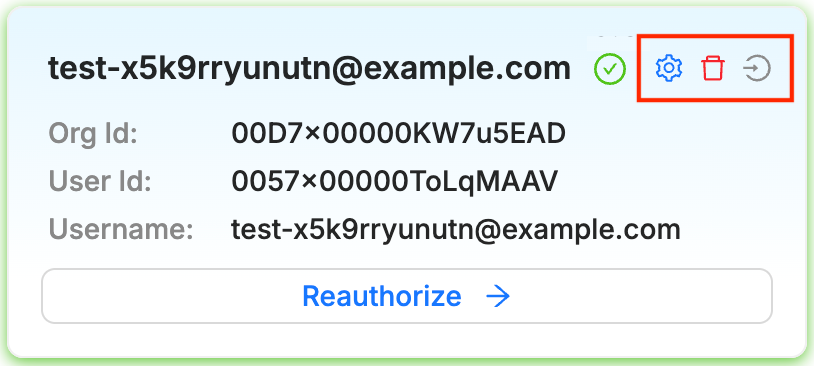
You can use the icons at the top right of each organization card to:
- Manage the access rights settings for the org (see Access Rules in Cirra AI)
- Remove the org connection
- Open the org (login may be required)
In a team account, owners and admins can also share the org with other team members (or all Salesforce users of that org) using the share control next to the Org Id.
Sharing an org
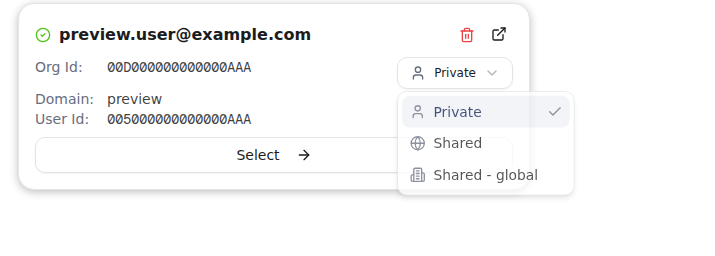
When you are working in a team account, each org card includes a share control next to the Org Id. Team owners and admins can change it; regular members see the current value but cannot change it.
The control has three options:
| Setting | Who can use the org |
|---|---|
| Private | Only you (the connection owner) |
| Shared | Invited members of your Cirra AI team |
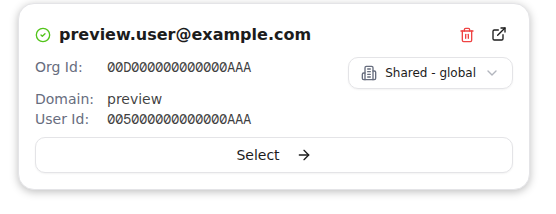
| Shared - global | Everyone who can log in to that Salesforce org (see below) |
Sharing is only available in a team context. Personal accounts have no share control — orgs you connect there stay private to you.
Shared with your team
Shared makes the org visible to every member of the Cirra AI team:
-
An owner or admin connects the org (if it is not already connected), then sets the share control to Shared.
-
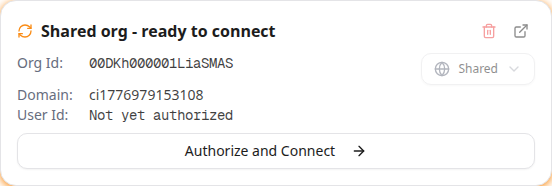
Other team members see a placeholder card labeled Shared org - ready to connect:
-
Each member clicks Authorize and Connect and completes their own Salesforce OAuth login.
-
After authorizing, the member has their own connection to the org and acts under their own Salesforce user and permissions — not the admin's.
Members can later delete their own connection; the shared placeholder reappears so they can authorize again. Only the owner of the original shared connection can unshare or delete it for the whole team.
Tool access settings on a shared org are owned by the sharer. Team members who authorize a shared org see those settings as read-only.
Shared - global (all Salesforce users of the org)
Shared - global goes further than team sharing: anyone who can log in to that Salesforce org can use Cirra AI from their AI client, without a Cirra AI invitation.
Before the setting is applied, you must confirm:
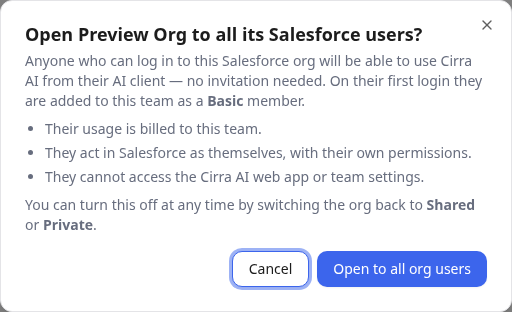
What happens when someone from that Salesforce org connects for the first time:
- They are added to your Cirra AI team as a Basic member
- Their usage is billed to the team
- They act in Salesforce as themselves, with their own permissions
- They cannot use the Cirra AI web app
Shared - global is available for production orgs only (not sandbox, Developer Edition, or scratch orgs).
You can turn global sharing off at any time by switching the org back to Shared or Private. Existing Basic members remain on the team until an admin removes them.
Access rights and security
It is critically important to carefully control access to your enterprise (meta)data. Cirra AI and Salesforce together provide multiple layers of protection:
- All access to Cirra AI is through OAuth with either a Connected App or an External Client App
See the next section to learn more about the choice between the app types - Whichever option you choose:
- You do not need to share your Salesforce user credentials with Cirra AI
- Cirra AI's access to your Salesforce org is limited to that of the user you used to establish the OAuth connection.
- You can revoke the access granted to Cirra AI at any time
- The OAuth user can be an API only user.
- Salesforce provides numerous tools to control who has access to Connected or External Client Apps
- See the Restricting access to selected users section below
- Cirra AI allows you to further limit the access granted to orgs, categories of orgs, roles, users, objects and fields, to avoid exposing confidential information
Also:
- Cirra AI does not store any (meta)data or train models on it
- You can select an LLM provider that provides acceptable data privacy assurances
- Leading providers allow you to (at least) opt out of sharing your data for training purposes
- AI clients typically allow you to require approval before sensitive tools are called
Connected App vs External Client App
Salesforce is steering integrations away from Connected Apps and toward External Client Apps (ECAs), the modern replacement. Cirra AI supports both, and when you connect an org the Add Organization dialog shows an OAuth app options dropdown so you can choose which OAuth client the connection uses:
- Cirra AI Connected App — the default.
- There is no package to install, and the app is usually provisioned seamlessly when you first connect Cirra AI to your org.
- For non-admin users or orgs with restrictive settings, an administrator may need to explicitly install and approve the app.
- See Using the Connected App for details.
- Cirra AI External Client App — Cirra AI's shared ECA.
- Gives more control over how the app is governed, and is in line with Salesforce's long term direction
- A managed package must be installed into each org before it can be used — unlike a Connected App, an ECA is not automatically available across orgs.
- See Using an External Client App for details.
- Custom External Client App — an External Client App you created yourself
- This option provides the most control, such as rotating secrets on your own schedule.
- It requires that you create your own ECA and install it into each org first.
- See Registering your own External Client App for details.
At a glance:
| Connected App (default) | External Client App | |
|---|---|---|
| Availability | Legacy — Salesforce is transitioning away from Connected Apps | Modern replacement |
| Per-org install | Sometimes required. Depends on the org settings and user profile | Required — you must install the package in each org before use |
| Available across orgs | Yes — provisioned on first connect | No — installed per org |
| App Credentials | Managed by Cirra AI | Choose either Cirra AI's shared app, or your own consumer key / secret |
| Best for | Getting started quickly | Stricter governance, future proof |
Using the Connected App
In many cases, the Connected App install is seamless and does not require any user interaction beyond approving the access. However, Salesforce is increasingly limiting the use of so called "uninstalled connected apps", as explained here.
If you receive an OAUTH_APPROVAL_ERROR_GENERIC error when connecting your org with a message app must be installed into org, a System Administrator will need to explicitly install the Connected App before it is made available to users.
You may also want to install the app if you want to restrict which users can access the app.
Either way the steps are as follows:
-
As a Salesforce Admin, connect the Salesforce org to Cirra AI and authorize it using OAuth
Please see below for troubleshooting steps if you have issues authorizing the app
-
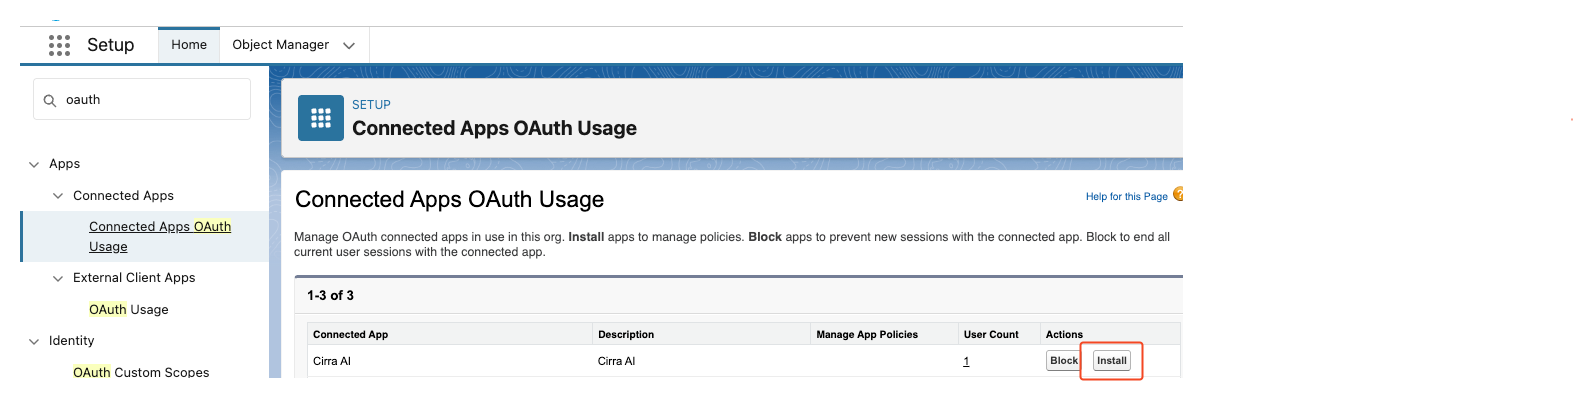
Explicitly install the Cirra AI Connected App
In Salesforce Setup, go to Connected Apps OAuth Usage, locate the Cirra AI app, and click Load Actions followed by Install
Using an External Client App
External Client Apps (ECAs) are the replacement for Connected Apps, and Salesforce is incrementally transitioning all integration to ECAs. We recommend that you use the ECA option for stable production orgs.
Cirra AI allows you to use a shared ECA provided by us in a managed package, or a custom ECA that you create yourself.
Either way, to connect an org with an External Client App the app must first exist in that org.
In the Connect Salesforce Organization dialog, open OAuth app options and choose which app to use:
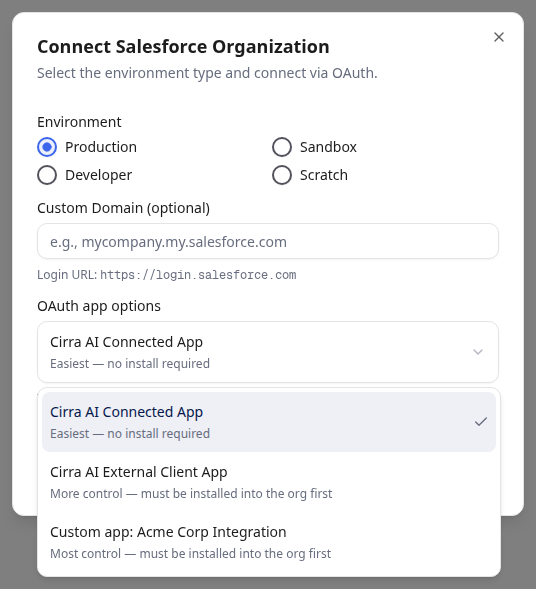
- Cirra AI Connected App — easiest; no package install required in most cases
- Cirra AI External Client App — Cirra AI's shared ECA; must be installed into the org first
- Custom app: <name> — an External Client App you registered under Custom External Client Apps; also must be installed into the org first
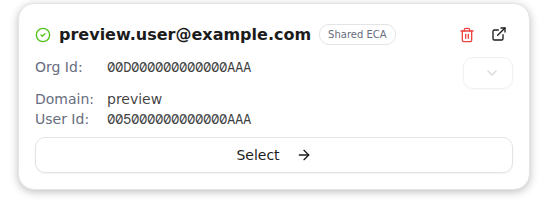
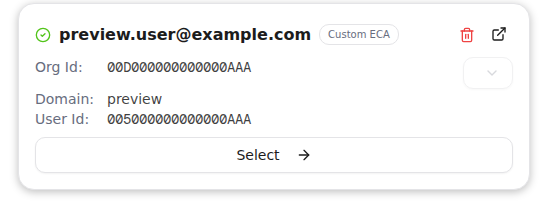
After connecting, the org card shows a badge when an External Client App was used:
-
Shared ECA — connected with Cirra AI's shared External Client App
-
Custom ECA — connected with one of your registered custom External Client Apps
Installing the shared Cirra AI External Client App
A System Administrator must install the packaged app into an org before any users can connect Cirra AI to it:
- In the target org, either:
- Install the Cirra AI External Client App package from this link (for production orgs) or this one (for sandboxes), or
- run
sf package install --package 04tVs000000JAIDIA4 --target-org <your-org>on the command line (SF CLI required).
- Select "Install for Admins Only" and complete the install.
- Back in Cirra AI, click Add Organization, pick Cirra AI External Client App from the OAuth app options dropdown, and authorize as usual.
Sandboxes receive a copy of an installed managed ECA when they are created or refreshed, so you generally install once per production org.
Registering your own External Client App
If you would rather use your own consumer key and secret, for example to control the secrets rotation schedule, you can create an External Client App in your Salesforce org and register it with Cirra AI:
-
In your Salesforce org, create an External Client App with the following specs:
- Callback URL: https://api.cirra.ai/oauth2/callback (must match exactly -- no trailing
/or space) - Scopes:
id(identity URL service),api,refresh_token,openidand (optional)wave_api(for running reports)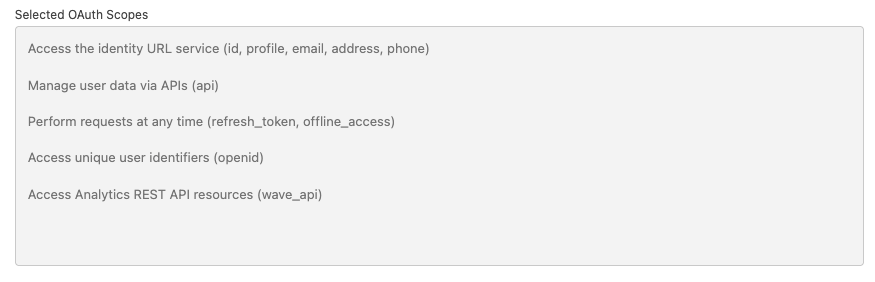
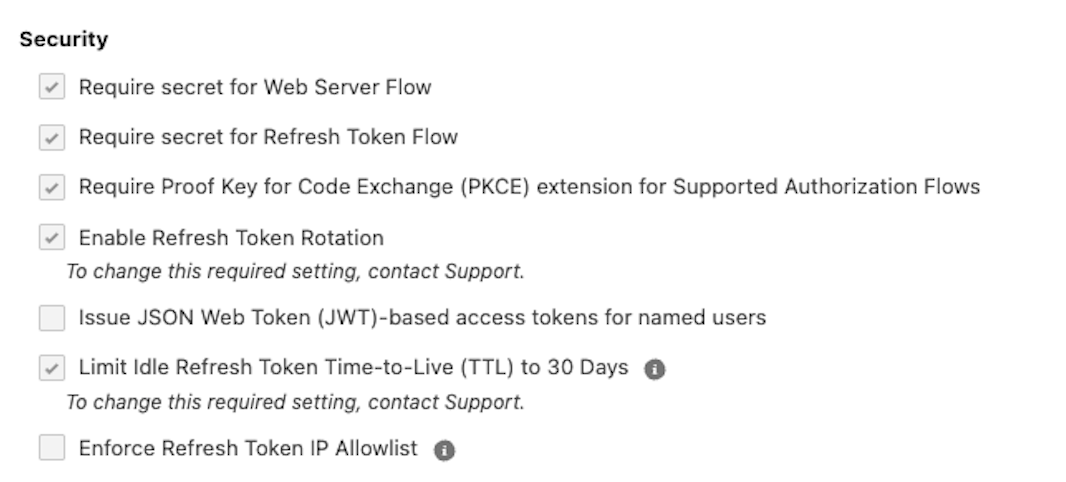
- Security settings as follows:
- Callback URL: https://api.cirra.ai/oauth2/callback (must match exactly -- no trailing
-
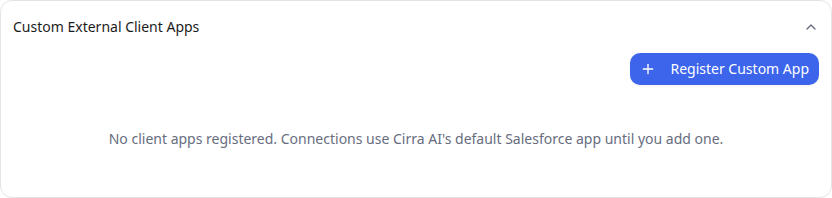
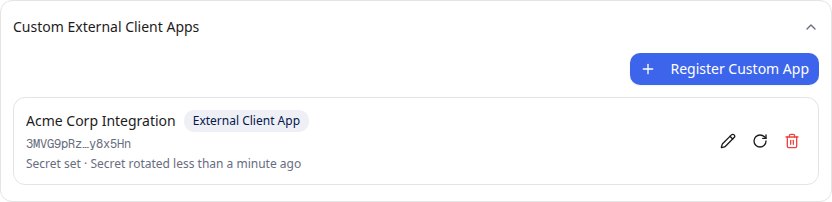
In Cirra AI, open the Salesforce Organizations page (https://app.cirra.ai/settings/salesforce). Account owners and administrators (and personal accounts) can register custom apps: click manage in the connection notice to expand Custom External Client Apps.
-
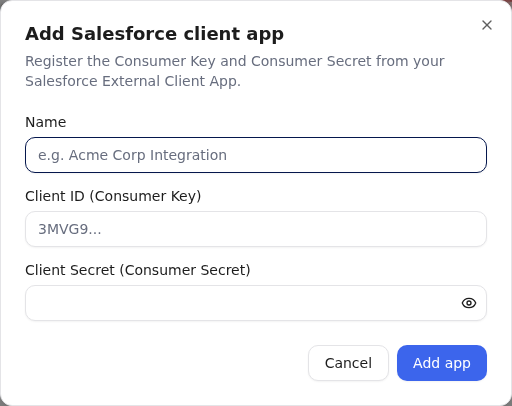
Click Register Custom App. In the Add Salesforce client app dialog, enter a name plus the app's Consumer Key (Client ID) and Consumer Secret, then click Add app. The secret is stored securely.
The new app then appears in the list:
-
When connecting an org, choose Custom app: <name> from the OAuth app options dropdown.
Only account owners and administrators (and personal accounts) can register client apps; team members without those permissions will not see the management controls.
Restricting access to selected users
Whether you are using the Connected or External Client App, you can configure it to restrict access to selected groups of users.
The process is very similar for both types of apps. For details see Manage Access to a Connected App or Manage External Client Apps respectively.
- Edit the OAuth Policies
- For Connected App:
- Click Edit Policies on the app detail screen
- Or from the Connected Apps OAuth Usage list, click Load Actions followed by Manage App Policies
- For the External Client App
- Select the Policies tab on the app detail screen and click Edit
- Open the OAuth Policies section.
- For Connected App:
- Set the OAuth policy to Admin approved users are pre-authorized
- Assign permission to use the app to specific users
- Most explicit is to create and assign a dedicated Cirra AI permission set (the set can be empty -- it's just used for this one purpose).
- But you can also use existing profiles or permission sets
- Either way, add the profile(s) or permission set(s) to the list on the app detail screen
 (this screenshot is for the Connected App, but the External App looks very similar)
 - Users who do not have the required profile(s) or permission set(s) will not be able to connect to the org from inside Cirra AI
Using a dedicated API Integration user
Instead of connecting with a Salesforce user with a full license, you can use a free Salesforce Integration user to connect Cirra AI to your org. This avoids tying the connection to a named user's account, without adding the cost of a paid license.
Note that anyone connecting with the API user credentials will be working under the same user name, so you cannot distinguish in the Salesforce logs who made a given change.
To set this up:
- Connect Cirra AI as a System Administrator first
- If using a Connected App, it must be explicitly installed for API-only users to connect. Follow the installation steps above
- Create an integration user with the following settings:
- License: Salesforce Integration
- Profile: Minimum Access - API Only Integrations
- Assign the Salesforce API Integration Permission Set License to the user
- Create a permission set with all the permissions you want to grant this user, and assign it to the user
- Use the integration user to connect Cirra AI to the org (add a new connection via OAuth)
- Remove the original admin connection — you can now safely delete the connection that used your admin user
This setup is typically only needed for production orgs. In sandbox orgs you can simply use regular users.
Access Rules in Cirra AI
On top of the security and control provided by OAuth and Salesforce, Cirra AI lets you further restrict what the MCP server may read and write — by data category (Metadata, User Data, Personal Setup Data, Business Data), per org category or individual org, per role or user, and down to individual objects and fields. When several rules apply, the strictest one always wins.
You manage these rules on the Access Rules page. The category-level rules can also be viewed and edited via the settings icon on each org category and org card — see Org-level access settings.
Troubleshooting OAuth approvals
If you receive an error when authorizing a connection to your org it is most likely due to various Salesforce security mechanisms.
The most common issues are shown below.
If you continue to face problems, please contact us for support.
OAUTH_APPROVAL_ERROR_GENERIC
If you receive an OAUTH_APPROVAL_ERROR_GENERIC error (with app+must+be+installed+into+org visible in the browser URL) this is most likely because you do not have permission to install Connected Apps.
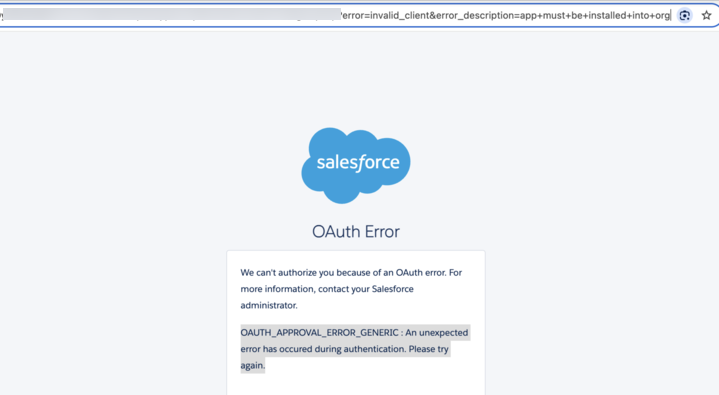
To resolve this you can ask your System Administrator to either:
- Grant you the Approve Uninstalled Connected Apps permission
- Either by adding that permission to an existing permission set assigned to you, or by creating a new permission set with that permission added
- Install and approve the Cirra AI Connected App as described above under Using the Connected App
For more detail on the "Approve Uninstalled Connected Apps" user permission and installing Connected Apps see: Prepare for Salesforce Connected App Usage Restrictions Change
Authorization Failed: Missing authorization code
If the OAuth flow ends with Authorization Failed: Missing authorization code, Salesforce refused to issue an authorization code back to Cirra AI because the connecting user is not approved to use the Cirra AI Connected App in that org.
Underneath, Salesforce redirects back to Cirra AI with:
error=OAUTH_APP_ACCESS_DENIED
error_description=user is not admin approved to access this app
This happens when the Cirra AI Connected App's OAuth policy in the target org is set to Admin approved users are pre-authorized, and the connecting user's profile or permission set has not been granted access to the app. It is a common gap after a sandbox refresh — Connected App OAuth policies and permission-set assignments frequently do not carry over from production and need to be reconfigured per sandbox.
Being able to log in to the org directly through the Salesforce UI does not mean the OAuth flow will succeed: the direct login only tests Salesforce authentication, whereas Cirra AI's OAuth flow additionally requires that the user be approved for the Cirra AI Connected App in that org.
To fix it, a System Administrator in the target org needs to grant the user access to the Cirra AI Connected App:
- In Salesforce Setup, open App Manager (or Connected Apps OAuth Usage).
- Find the Cirra AI app and click Manage.
- Click Edit Policies and choose one of:
- Leave Permitted Users as
Admin approved users are pre-authorizedand use Manage Profiles or Manage Permission Sets on the Connected App Detail page to assign the connecting user's profile or permission set to the app. This is the more controlled option and the one we recommend. - Change Permitted Users to
All users may self-authorize— broader and less restrictive: any user in the org can then authorize the app.
- Leave Permitted Users as
Then return to Cirra AI and click Reauthorize on the org (or add it again).
See Restricting access to selected users above for the full recommended setup, including creating a dedicated Cirra AI permission set for this purpose.
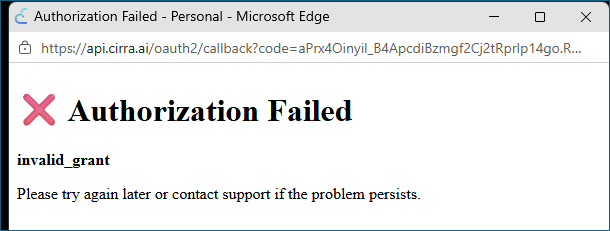
Authorization Failed: invalid_grant
invalid_grant means Salesforce accepted the initial login screen but then
refused to issue the OAuth access token at the end of the flow. Salesforce
returns this code generically — it does not tell Cirra AI why — so the
next step is always to find the real underlying cause.
1. Re-check what you entered
These mistakes are by far the most common cause of invalid_grant. Verify
them first before digging deeper:
-
Use your Salesforce username, not your email address. They often look alike but are different fields. Your Salesforce username is the value shown in Setup → Users → your user → Username — typically suffixed with the sandbox name on a sandbox (for example,
jane@example.com.dev). Entering your email address here is a frequent source ofinvalid_grant. -
Pick the correct environment in the Connect Salesforce Organization dialog — Sandbox for sandboxes, Production for production orgs, Developer for Developer Edition orgs. Connecting to a sandbox as Production (or vice-versa) fails with
invalid_grant. -
Set the custom domain to match the org you are connecting to. For a sandbox the domain must contain
sandbox(e.g.https://mycompany--dev.sandbox.lightning.force.com). The dialog shows the resulting Login URL below the field — verify it matches the org you want.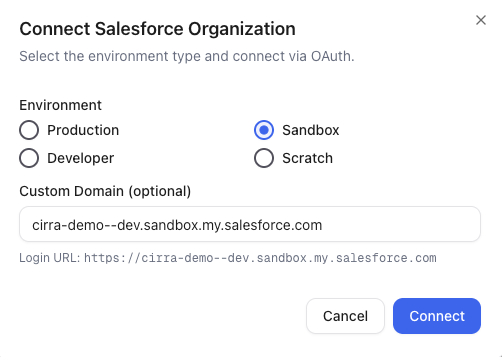
-
Retry in an incognito / private window. A stale Salesforce session in your normal browser can complete the OAuth flow as the wrong user, which then fails token exchange against the org you actually wanted.
This assumes you can already sign in to the org through the Salesforce UI with the same user — i.e. the user is active, licensed, and not blocked by login-hours or similar policies.
2. Read the real reason in Login History
Salesforce records the actual failure reason for every login attempt. If the checks above don't resolve it, look it up directly:
- In the target org, enter Login History in the Quick Find box, then select Login History.
- Filter to the username you tried to connect with, around the timestamp of the failure.
- Open the failed row and read the Status column — that is the real
reason. Common values point to one of:
- App not approved / Connected App blocked — see Connected App policy below.
- Restricted IP — see Login IP Ranges below.
- Restricted login hours — the user's profile only allows login during specific hours.
- User is frozen / inactive — the Salesforce user is disabled.
- Invalid password — the credentials entered were wrong (often goes together with mistyping email-vs-username; see step 1).
Connected App policy
If Login History indicates the app was blocked, the Cirra AI Connected App is restricted to a subset of users. A System Administrator can check this:
- In Salesforce Setup, open App Manager (or Connected Apps OAuth Usage).
- Locate the Cirra AI app and click Manage.
- Click Edit Policies and inspect Permitted Users.
If Permitted Users is set to Admin approved users are pre-authorized,
the connecting user must be granted access through one of the profiles or
permission sets listed on the Connected App Detail page. See
Restricting access to selected users above for the
recommended setup.
Login IP Ranges
Some orgs restrict logins to a set of trusted IP addresses by configuring login IP ranges on the profile of the connecting user. This is a common security hardening that also applies to API and OAuth logins, and shows up as Restricted IP in Login History.
Because Cirra AI connects to your org from its own servers, Salesforce blocks
the connection with an ip restricted error unless Cirra AI's IP address is
on the allowlist.
To allow access, a System Administrator should add the Cirra AI outbound IP addresses to the Login IP Ranges of the profile assigned to the user used to connect Cirra AI:
-
In Salesforce Setup, enter Profiles in the Quick Find box, then select Profiles.
-
Open the profile of the Salesforce user you use to connect Cirra AI.
-
In the Login IP Ranges section, click New (or Add IP Ranges in the Enhanced Profile User Interface).
-
Add two new IP ranges, one for each of the following addresses:
104.46.202.129and20.72.202.165.Each address is a separate single-address range with the address set as both the IP Start Address and IP End Address. Optionally set the description to
Cirra AI.
-
Click Save.
Then return to Cirra AI and click Reauthorize on the org (or add the org again). The connection should now succeed.
These addresses are static under normal operation and we will notify customers if they change. You can also return here for an updated list if reauthorization starts failing with an ip restricted error.
For Salesforce's documentation on this feature, see Restrict Login IP Addresses in Profiles.
Passkey or passwordless login fails
Some orgs require a passkey — or another WebAuthn method such as a security key or a built-in authenticator like Touch ID or Windows Hello — to log in. If yours does, the connection can fail with a login error even though you can sign in to the org normally in your browser.
A passkey is a WebAuthn credential whose private key is bound to the domain
it was registered against — your org's My Domain login URL (see Salesforce's
Passwordless Login with Passkeys).
When you start the connection without entering a custom domain, Cirra AI
sends you to the generic Salesforce login page (login.salesforce.com, or
test.salesforce.com for a sandbox), where the domain-bound passkey isn't
offered and the login can't complete.
Fix: enter your org's custom domain in the Connect Salesforce Organization dialog before connecting. The login then runs against your org's My Domain, where username / password followed by the passkey challenge succeeds as expected.
For a sandbox the domain must contain sandbox (for example
https://mycompany--dev.sandbox.lightning.force.com); the dialog shows the
resulting Login URL below the field so you can confirm it targets your org.